
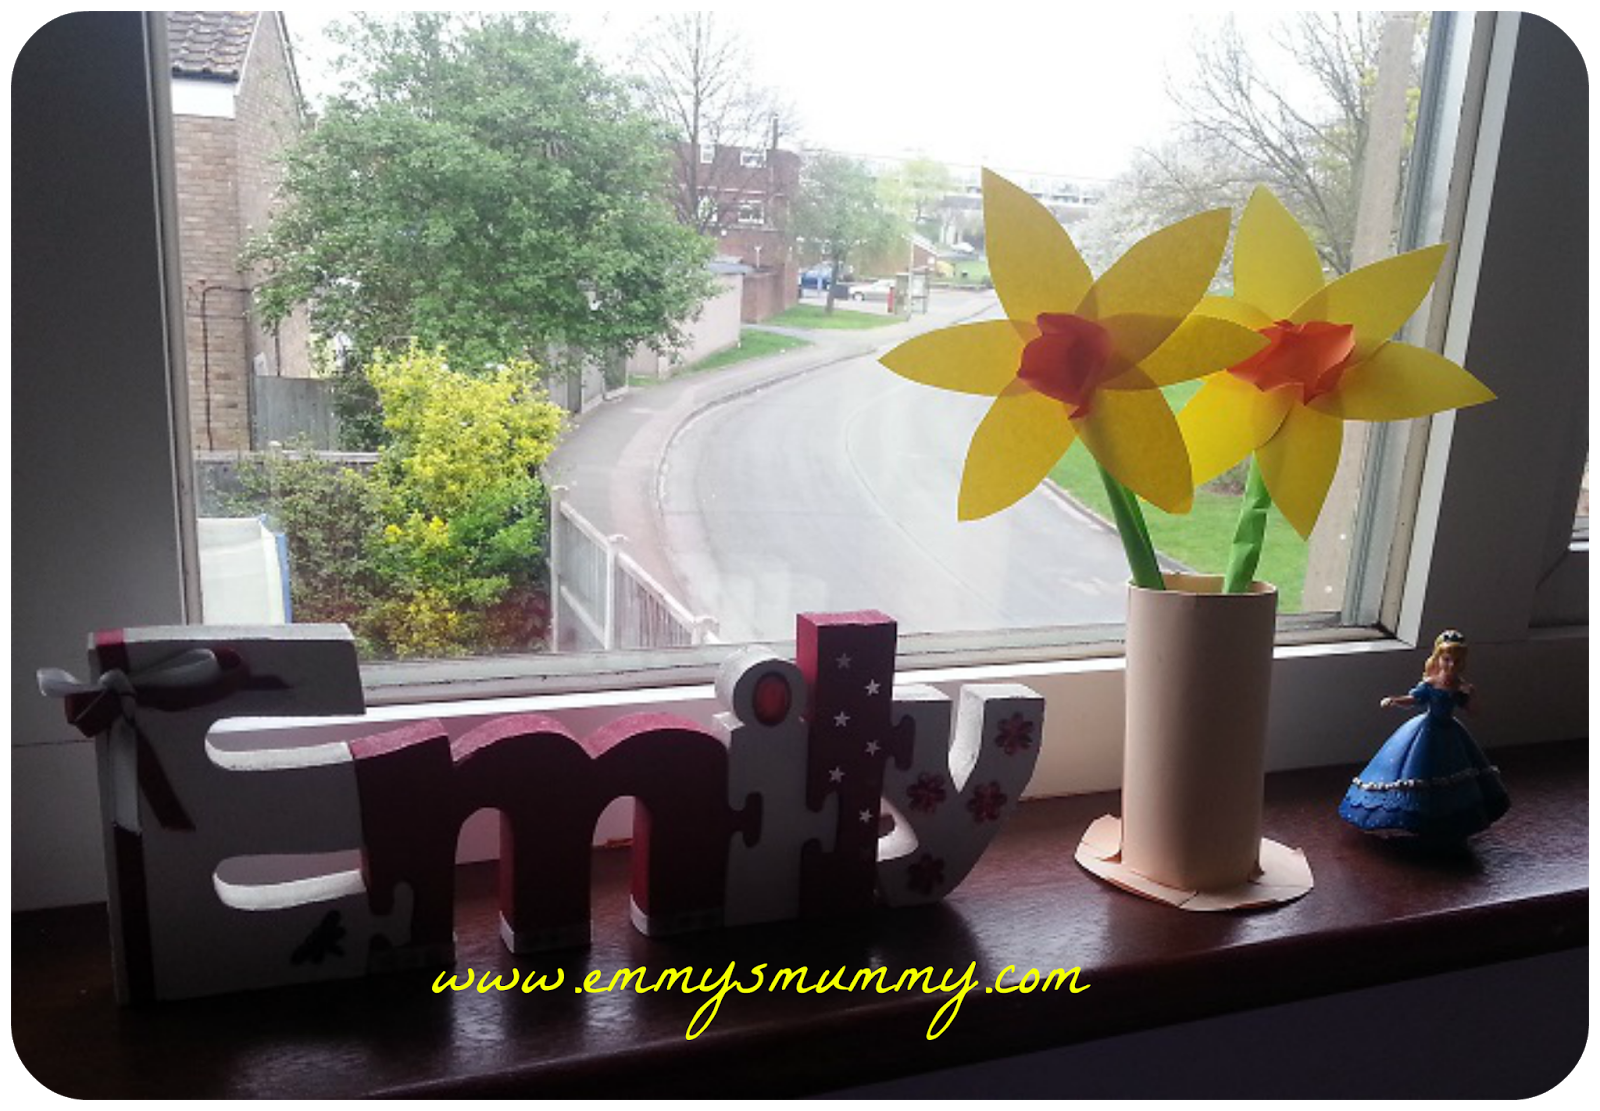
Spring is here and we are surrounded by
beautiful flowers emerging - Tulips and Daffodils are plentiful at the moment
but sadly they don't last long once in your home.
Why not make your own with the kids which will last forever?
I promise they are really easy to make, I did these with my 4
year old Emmy and it only took around 20 minutes and very little prep.
You will need:
Toilet roll tube (or kitchen roll tube cut in half)
Yellow card or paper
Orange paper
Green paper
Any colour paper for your vase
Glue
Cellotape
Scissors
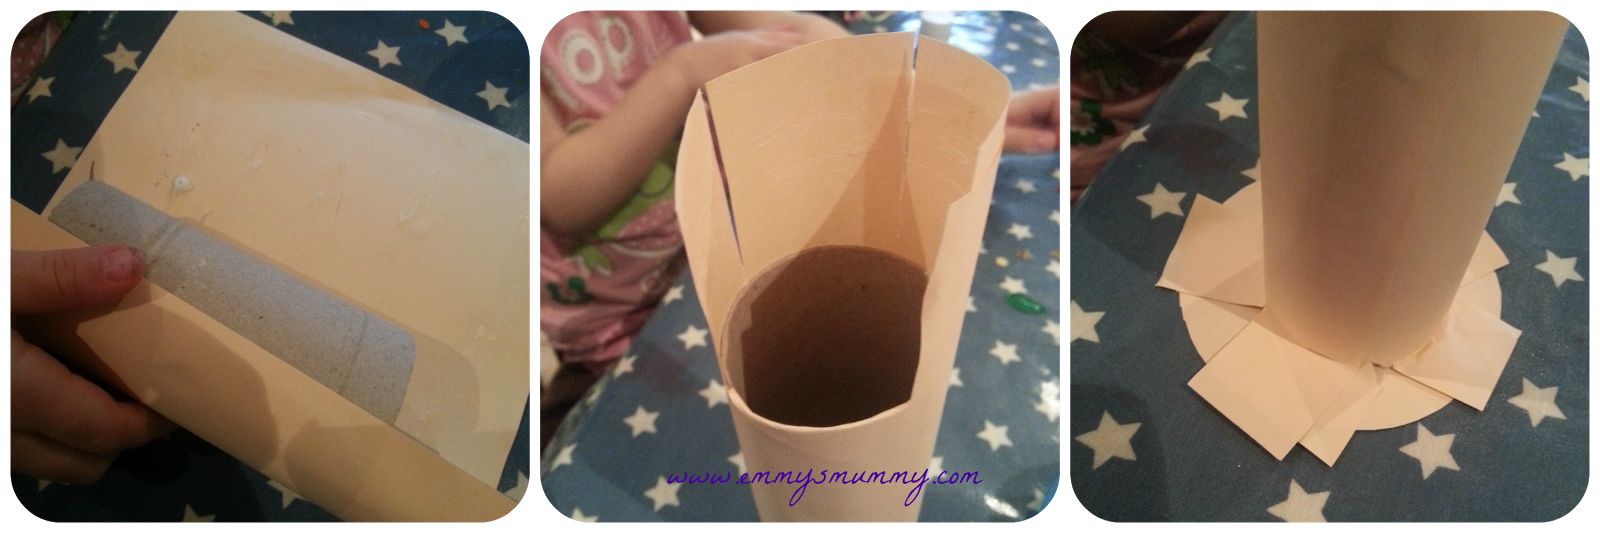
To start cover the toilet roll with coloured paper. To
do this draw a circle and cut around this - I used the cellotape roll to draw
around for ease. Put this aside and use the rest of the paper to cover
the toilet roll (place the roll in the middle of the paper and roll the paper
around), you will be left with excess paper at both ends of the roll, cut slits
into this paper and press inside of the tube to hide - this is the top of the
vase, cut slits in the bottom but pull them outwards this time. Place the
bottom of the vase onto the circle shape you cut out and glue all together,
trim and you are finished.
Next up are
the daffodils.
Take an A4
piece of green paper and cut in half. Roll this up into a tight tube (or
use a green straw!) and cellotape into place. This is the stem of your
daffodils.
Next take a
yellow piece of A4 paper, fold in half, then in half again and finally one more
time. Then draw petal shapes onto the paper - make sure the bottom of the
petal is drawn over the folds in the paper.

Cut these out
and unfold, you will have quite a few double petals. Take 3 of these and
arrange over each other in a flower shape and stick together.

Now you need
to cut a small circle shape from the orange paper - I made rough circle shapes
by cutting a square and rounding the edges. Add glue to the middle of this
circle and glue to the centre of your yellow petals - to make the shape I found
it was best to place your finger into the centre of the orange circle and pull
the edges up around my finger to form the cups.

Lastly cellotape the stems onto the flowers, pop into your
vase and you have an ever lasting vase of flowers. If you like you can
then decorate the vase with stickers, ribbons or with drawings.

haha finally flowers I won't be able to kill lol gret tutorial x
ReplyDeleteThank you for having me today.
ReplyDeleteOurs are still in Emmys room and no water ends up on the bed this way!
aww these are so cute and I rememebr making these! xxx
ReplyDeleteThis is a great idea, even molly can have a go at these
ReplyDeleteoh, this is great! Do-able for an almost 3-year old and I and we have all the supplies. Thank you!
ReplyDeleteThat's really sweet. I used to make flowers every spring with children and they were never as simple as that I'm sure :)
ReplyDeleteHow cute are they! Much better than my version and a whole lot easier too!
ReplyDeletex x
looks so simple!
ReplyDelete
ReplyDeleteMy webpae - garcinia